Urban Homesteading for Beginners: The Complete Guide for Renters and Small Spaces
Most people who find this article are renting. Or living in an apartment. Or in a city. And they’ve looked at the word “homesteading” and assumed it doesn’t apply to them — that it’s for people with land, a barn, and somewhere to keep chickens.
That’s the wrong assumption, and this guide is here to correct it.
Urban homesteading is real homesteading. It’s not a watered-down version for city people who can’t access the real thing. The skills are the same. The mindset is the same. The constraints are different — and those constraints turn out to be a decent teacher.
I started on a rented property in New Zealand with no experience, no outdoor space to speak of, and no plan beyond wanting to be less dependent on supermarkets. This guide is what I’d have wanted on day one.
What Urban Homesteading Actually Means (It’s Not What Most People Picture)
Urban homesteading is the practice of building self-reliance and reducing dependence on industrial supply chains — from an urban or suburban home, rather than a rural property.
That’s it. No acreage required. No livestock. No property ownership. The practices that make up homesteading — growing food, preserving it, fermenting, cooking from scratch, reducing waste, building practical skills — are all available to you in a flat, a terrace house, or a city apartment.
The picture most people have of homesteading comes from a particular image: the off-grid rural property with raised beds, a root cellar, and chickens wandering around. That’s one version. Urban homesteading is the same direction of travel, applied to a completely different type of space.
What the two have in common is the underlying goal: producing more of what you need, buying less of what you don’t, and building skills that make you genuinely capable rather than dependent.
Do You Need Land to Homestead? (Short Answer: No)
No. You do not need land to homestead.
Here’s the honest list of what urban homesteading actually requires:
- A kitchen (any rental has one)
- Light from at least one window
- Containers for growing (a few pots from any garden centre)
- Potting mix (one small bag covers several pots)
- Basic equipment for food preservation (jars, a large pot)
- The intention to build the skills
That’s the full entry cost. Everything else — more growing space, better equipment, more sophisticated techniques — comes later, as you build on what you’ve already learned.
The land question does affect scale. A person with a quarter-acre can grow more food than a person with a balcony. But the fundamentals of food growing, fermentation, food preservation, and scratch cooking are all available at any scale. Start with what you have. The scale comes later if you want it.
For a full breakdown of what’s specifically available to renters, see Homesteading for Renters: What You Can Actually Do Without Owning Land.
Urban Homesteading Skills to Start With
You don’t need to master all of these at once. You need to start with one. But here is the full range of skills that make up a working urban homestead, roughly ordered from easiest to get into.
Growing Your Own Food (Even on a Windowsill)
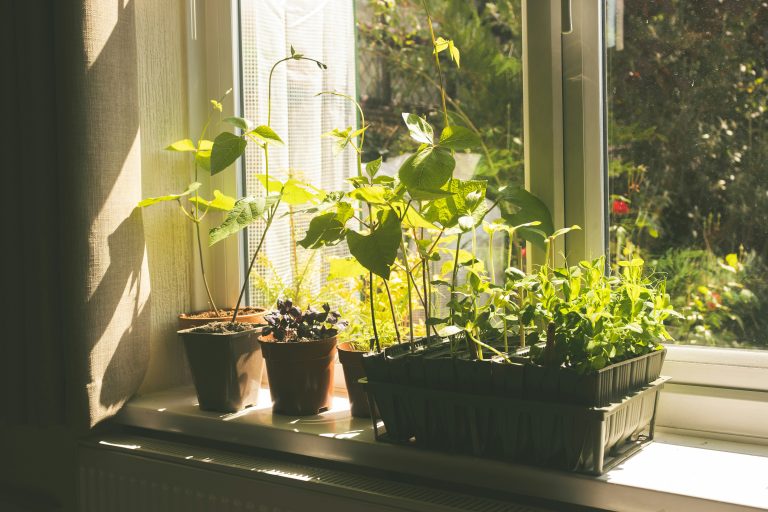
Growing food at home is the skill most people associate with homesteading, and it’s available at every scale. The smallest starting point is a single pot of herbs on a windowsill. The next level up is a balcony with containers. Beyond that: a community garden plot.
All three of these count. All three produce real food. The key insight for beginners is that you don’t need to start with the most ambitious version — a windowsill herb that you actually harvest and use every week is worth more than an elaborate balcony setup you abandon by March.
The crops that work best for beginners in small spaces: herbs (basil, chives, parsley, mint, coriander), salad greens (lettuce, spinach, rocket), radishes, cherry tomatoes, and microgreens. These are all fast, forgiving, and rewarding for someone who’s never grown anything.
Indoor and Balcony Gardening
Container gardening is a genuine growing method — not a compromise. Tomatoes, beans, kale, chillies, lettuce, and a long list of other vegetables grow well in pots with the right setup.
What the right setup means: containers with drainage holes, quality potting mix (not garden soil — it compacts in pots and suffocates roots), consistent watering, and adequate light.
Light is the variable that most determines what you can grow. The sun-facing direction that gets the most light matters here: in the Northern Hemisphere (US, UK, Europe), a south-facing window or wall gets the most direct sun. In the Southern Hemisphere (New Zealand, Australia), the equivalent is north-facing. For future references in this article I’ll just say “your sunniest window” or “sun-facing” — you now know what that means for your location.
A balcony with good sun exposure can sustain a meaningful food garden through the growing season. The principles are the same as any container gardening: start with the right-sized container for each crop, keep up with watering (containers dry out faster than in-ground soil), and give sun-hungry crops like tomatoes your best light position.
Composting in Small Spaces
Composting in a flat or rental is possible. The method changes — you’re not building a heap in the garden — but the outcome is the same: food scraps become something useful rather than landfill.
Two methods work well without outdoor space:
Bokashi composting uses a sealed bucket and bokashi bran (inoculated wheat bran). You layer food scraps with bran, seal the bucket, and an anaerobic fermentation process pre-digests the material over two to four weeks. The result can go to a community garden, a friend’s compost heap, be buried in any available outdoor soil, or mixed into your garden pots. Bokashi handles meat, dairy, and cooked food that traditional compost can’t. It doesn’t smell like rot — it smells sour, like pickles. The bucket lives under the bench.
Worm farming (vermicomposting) uses a small bin and a colony of red wigglers (Eisenia fetida — not ordinary garden worms). They break down vegetable scraps, paper, and cardboard into worm castings, which are an extremely rich fertiliser. A well-maintained worm farm doesn’t smell and can sit under a kitchen counter. What kills a worm farm: temperatures below 10°C or above 30°C, overloading with acidic scraps (citrus peel, onion), and letting it dry out or become waterlogged.
If neither option suits you, many cities have community compost drop-off points. Look up your local council or nearest community garden.
Food Preservation Basics
Preserving food is one of the foundational homesteading skills, and it’s entirely kitchen-based — no outdoor space, no special facilities.
The entry points for beginners:
Refrigerator pickling is the easiest. You make a vinegar brine, pour it over vegetables in a jar, and refrigerate. The acidity of the vinegar preserves the vegetables for several weeks to a few months depending on the brine ratio. No special equipment, no processing required. Cucumbers, radishes, carrots, red onion — all work well.
Fermentation is next. Sauerkraut and kimchi are made by lacto-fermentation: salt draws moisture out of the vegetables, the naturally occurring Lactobacillus bacteria on the surface produce lactic acid, and the acidic environment preserves the food and develops flavour. You need a jar, a vegetable, and salt. That’s it.
Dehydrating extends shelf life from days to months. A countertop dehydrator costs $60–150 and is roughly the size of a toaster. You can dehydrate herbs, fruit, surplus vegetables, and make your own dried mushrooms. An oven at its lowest setting with the door slightly ajar works as an alternative, though it’s less precise and uses more electricity.
A note on water bath canning: it works for shelf-stable jars, but it is only safe for high-acid foods — pickles, jams, acidified tomatoes. Low-acid foods require pressure canning, which is a different process. For beginners, stick to refrigerator pickling and fermentation first.
Cooking From Scratch
Cooking from whole ingredients rather than processed ones is a homesteading skill as much as any of the others. It reduces food costs, reduces packaging waste, and builds a kind of kitchen fluency that makes every other homesteading skill easier.
Practical starting points: a no-knead bread loaf (5 minutes of actual work, overnight rise), cooking dried legumes instead of tinned, making stock from vegetable scraps and bones, and learning to use every part of what you buy. These aren’t difficult techniques — they’re habits that take a few months to establish and then become second nature.
Reducing Waste and Buying Less
This is the skill that connects everything else. The homesteading approach to consumption is: produce what you can, preserve surplus, use everything you buy, and be deliberate about what you bring into the house.
In practice, this means: shopping with a list based on what you’re going to cook, buying produce over packaged food where you can, using scraps rather than discarding them, making your own cleaning products from simple ingredients (white vinegar, bicarbonate of soda), and generally developing a mindset that treats resources as worth protecting.
None of this requires a big lifestyle overhaul. It accumulates gradually, and each small habit change has a direct, measurable effect on what you spend and what you throw away.
Urban Homesteading for Renters: What You Can Do in a Rental
Most urban homesteading activities need no landlord conversation at all. Fermenting, cooking from scratch, preserving food, composting in a bin — these are just things you do in a kitchen and a rental gives you a kitchen.
The areas where it’s worth checking your lease:
Balcony modifications. Placing containers on a balcony floor is standard and rarely an issue. Installing brackets, planters bolted to railings, or any structural addition is where you need to check first. The principle is: if it doesn’t alter the property and leaves no trace when you move out, you almost certainly don’t need permission.
Worm farms. A small worm bin managed correctly is odourless and invisible. If you’re uncertain, ask — but in practice this is rarely an issue with landlords.
Growing in containers vs. in-ground. Pots and containers are personal property. You own them, you move them when you leave. Growing directly in a garden bed is a different question — get permission first if you want to dig or amend an existing garden.
Community gardens. These are completely independent of your rental tenancy. You rent a plot from the garden organisation, and it has nothing to do with your landlord.
One more thing worth naming: renters have a specific advantage that isn’t often acknowledged. The constraint of working with limited space forces precision. You learn what works because you’re paying close attention to a small number of plants in a small space. That attention builds skill faster than working at scale where failures are easier to ignore.
For more on this specifically, Homesteading for Renters: What You Can Actually Do Without Owning Land covers the full range of what’s available.
How to Grow Food in a Small Space
You don’t need a garden to grow food. You need light, containers, and the right crops for the space you have.
Windowsill Herbs
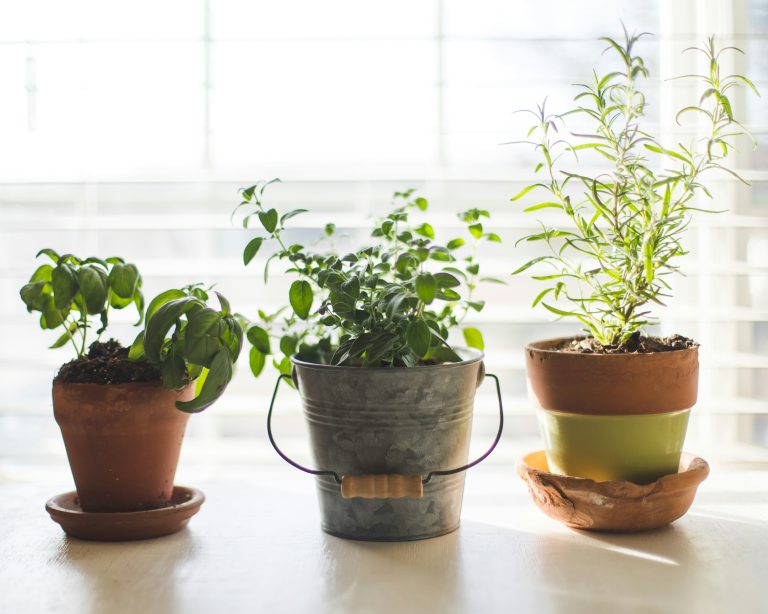
Herbs are the highest-value, lowest-maintenance entry point to growing food. They’re expensive to buy fresh, they’re used in small quantities, they grow quickly, and a bright windowsill is enough to sustain several plants.
The herbs that work best on a windowsill: chives, mint, parsley, and basil (in your sunniest window — basil needs the most light of the common kitchen herbs). These four cover a huge range of cooking.
The detail that most people miss: supermarket herb plants are crammed with multiple seedlings in a single small pot, grown under high greenhouse light and optimum nutrition. When you bring them home, repot them immediately. Separate the seedlings if possible, put them into a pot one or two sizes larger with fresh potting mix, and let them settle for a week before harvesting heavily. The transition stresses the plant, but it recovers and grows for months rather than dying in two weeks as most supermarket herbs do.
For a full walkthrough of what each herb needs and how to keep it productive: How to Grow Herbs Indoors in an Apartment.
Balcony Container Vegetables
A balcony that gets good sun is capable of producing real quantities of food through a growing season. The crops that perform best in containers:
- Cherry tomatoes — varieties like Tumbling Tom or Tiny Tim are bred for containers. They need a 10–15 litre pot minimum, your sunniest position, and consistent watering. They’ll produce through a full season.
- Lettuce and salad mix — fast, cut-and-come-again, and tolerant of partial shade. Sow directly in a wide shallow container and harvest outer leaves while the plant keeps growing.
- Dwarf French beans — compact varieties work in a 10-litre pot. One sowing produces a good harvest over several weeks.
- Kale and silverbeet — both grow well in containers and produce over a long season. Cut outer leaves and the plant keeps going.
- Chillies — compact plants that thrive in containers and tolerate heat. Slower than tomatoes but productive in a warm position.
- Radishes — fastest crop available to a beginner. Sow to harvest in 3–4 weeks. Good for maintaining momentum when other crops are slower.
The two things that determine container vegetable success more than anything else: adequate water (containers dry out faster than in-ground beds — daily watering in summer is normal) and quality potting mix. Don’t use garden soil in containers.
Microgreens and Sprouts Indoors
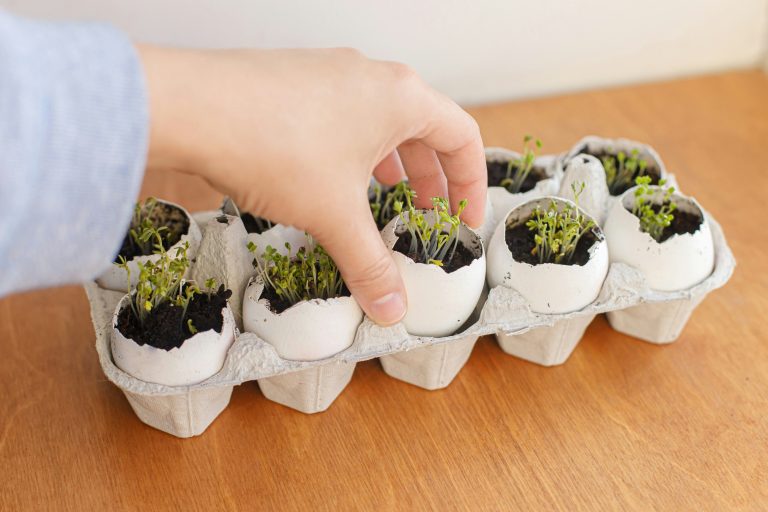
Microgreens are seedlings harvested at 1–3 weeks, when they’re 5–10cm tall and before their first true leaves emerge. They’re grown in a shallow tray of potting mix (or a specialised growing medium) on any flat surface — a kitchen bench, a shelf, a spare windowsill. No direct sun is needed; indirect light or a grow light works fine.
Common varieties for beginners: radish microgreens (fastest — 7–10 days), sunflower, peas, broccoli, and mixed salad blends. You harvest the whole tray at once with scissors, then sow again. It’s a simple rotation.
Sprouts are even simpler: no soil, no light required. Seeds (mung beans, lentils, fenugreek, alfalfa) soaked in a jar with a mesh or cloth lid, rinsed twice daily, sprouted on the bench. Most sprouts are ready in 3–7 days depending on variety. The equipment is a jar. That’s it.
Both are a way to grow nutrient-dense food year-round regardless of season, in any room, with minimal space and no growing season to wait for.
The No-Land Homesteader’s Starter Kit is the practical companion to this guide — container growing, composting, fermentation, and food preservation, all in one 45-page resource built for small spaces.
Built specifically for renters and apartment dwellers. $17.
Getting Started: A Practical First Week
Here is a realistic first week for someone who has never done any of this before.
Day 1: Go to a garden centre or hardware store. Buy one packet of salad mix seeds, one small bag of quality potting mix, and one pot with drainage holes (20–25cm diameter is plenty). Total cost: $15–25.
Day 2: Fill the pot with potting mix to about 3cm below the rim. Scatter a pinch of salad seeds across the surface. Cover with a thin layer (5mm) of potting mix. Water gently. Place in your sunniest window or on your balcony.
Day 3–6: Water when the top centimetre of soil is dry. That’s your only job. Seeds germinate in 5–10 days depending on temperature.
Day 7: While you’re waiting for seeds to germinate — start a sourdough starter. Mix 50g of flour with 50g of water in a clean jar. Stir well. Cover loosely and leave on the kitchen bench. Feed it tomorrow with the same amounts.
You now have two things running: a food garden and a fermentation project. Both require minimal daily attention. Both will deliver results within two weeks.
At the end of week one, add one more thing from this list:
- Order or buy a bokashi bucket to start diverting food scraps
- Buy a second pot and sow radish seeds (you’ll harvest in 3–4 weeks — faster feedback)
- Try a batch of refrigerator pickles (cucumbers, vinegar, salt, garlic, a clean jar — 10 minutes of work)
The pattern to establish in the first month: small, parallel projects rather than one big effort. Each project teaches you something, and the learning compounds across them.
Urban Homesteading on a Budget
Urban homesteading is not expensive. Most of the skills are about doing more with less, which means the financial return is usually positive from fairly early on.
What genuinely costs money, and what you can do about it:
Seeds: A packet of seeds costs $2–5 and produces many, many plants. Seeds are far cheaper per plant than buying seedlings. The trade-off is time — seedlings are faster. For a beginner, seedlings for your first season aren’t a bad idea while you learn. Move to seeds once you have a sense of timing and conditions.
Containers: You don’t need matching garden pots. Clean buckets, old stockpots, wooden crates lined with plastic, repurposed colanders — anything that holds potting mix and has or can have drainage holes works. Check your local buy/sell groups before buying new.
Potting mix: This is not a place to cut corners. Cheap potting mix is often mostly bark and air — it doesn’t hold moisture or nutrients well. One bag of decent potting mix costs $15–25 and fills several pots.
Preservation equipment: You don’t need a dehydrator on day one. Start with refrigerator pickles (you have jars in your kitchen already) and lacto-fermentation (jar + salt). A dehydrator becomes worthwhile when you have surplus produce or want to process herbs at scale.
Seed-saving: Once you’re growing, save seeds from any open-pollinated variety (not F1 hybrids — those don’t breed true). Dry them, store in a labelled paper envelope in a cool dark spot, and your seed costs approach zero after the first year.
Community: Connect with local homesteaders, community gardens, and buy/sell groups. People growing food give away surplus plants, seeds, and equipment constantly. I’ve sourced kombucha scobys, sourdough starter, and dozens of plant divisions for free from local communities.
The rough financial picture for a beginner year: $50–100 in equipment and seeds, returning that in reduced grocery spending within a few months once herbs, greens, and preserved goods are coming out of the kitchen. The return compounds as skills develop.
Building Community: Finding Your People in the City
Urban homesteading is easier with a community around you. Not because you can’t do it alone — you can — but because community accelerates learning, provides practical resources, and makes the whole practice more sustainable over time.
Where to find the community:
Community gardens. If you join a community garden, you’re immediately around other growers. Most community gardeners are generous with knowledge, seeds, and plant divisions. It’s the fastest way to learn practical growing skills from people who’ve already solved the problems you’re about to encounter.
Local Facebook groups and Nextdoor. Search for homesteading, food growing, or sustainability groups in your city. These are where people give away surplus seedlings, kombucha scobys, sourdough starter, excess produce, and second-hand equipment. They’re also where you’ll find out about local seed swaps and skills workshops.
Seed swaps. Many cities run annual or seasonal seed swaps — events where growers bring their saved seeds and swap with others. They’re free, you come home with varieties you’d never find in a shop, and the people there are generally exactly the community you’re looking for.
Permaculture groups. Most cities have an active permaculture group. Events and workshops are typically low-cost or free, and the knowledge base extends well beyond growing food into whole-systems thinking about self-sufficiency.
Online. The urban homesteading and apartment growing communities online are large and genuinely helpful. Subreddits like r/vegetablegardening and r/fermentation have millions of members with real experience. Specific communities for your city or region are often more useful than broad national ones.
One thing worth saying plainly: you don’t have to build community to start. You can grow herbs on your windowsill today without talking to anyone. But at the point where you’re ready to expand — more crops, more preservation, more skills — having people to learn from and swap with is genuinely valuable. It’s not about finding a tribe. It’s about not having to figure everything out from scratch when someone near you already has.
Frequently Asked Questions
Can I homestead in an apartment with no outdoor space?
Yes. Indoor herb gardens, windowsill salad crops, microgreens, sprouts, sourdough, fermentation, kombucha, and from-scratch cooking are all available with no outdoor space. What you lose without outdoor access is container growing for larger vegetables like tomatoes — but even that has workarounds with a good grow light and the right varieties.
Do I need to tell my landlord?
For most urban homesteading activities, no. Cooking, fermenting, growing plants in pots inside, and keeping a worm farm or bokashi bucket are your business. Where it becomes relevant: if you want to put containers on a balcony (check whether your lease restricts balcony modifications), or if you want to plant in an outdoor garden bed that belongs to the property (always ask first before digging or amending any garden bed).
How much time does it actually take?
Less than most people expect. Watering containers: 5 minutes a day. Feeding a sourdough starter: 2 minutes. Checking a ferment: 1 minute. The skills are low-maintenance once established. The learning phase — the first time you try a new technique — takes longer, but that’s time spent building a skill, not time you’ll keep spending forever.
What do I start with if I genuinely have never done any of this?
One seed packet or a pot of supermarket herbs, and a sourdough starter. That’s two things running in parallel: one that teaches you about growing, one that teaches you about fermentation. Both require minimal daily attention. Both give you results fast enough to stay interesting. Add one thing per month from there — our resource guides for apartment homesteaders cover each of these skills in depth when you’re ready for the next step.
Is it actually worth it financially?
Yes, for most people, over a reasonably short time frame. The first year involves small upfront costs (containers, potting mix, seeds, basic equipment) but the ongoing costs are low. Herbs you grow cost almost nothing per use compared to fresh supermarket herbs. Fermented foods you make are a fraction of the shop price. Bread from scratch costs a fraction of artisan bread. The financial case becomes stronger as skills compound.
Can I grow enough food to make a real difference to my grocery bill?
In an apartment or small space: meaningful but not total. You’re not going to feed yourself entirely from a balcony. What you can produce: most or all of your fresh herbs year-round, salad greens through the season, some vegetables, and fermented and preserved goods. That’s a real reduction in your food spend, not a token one — but it sits alongside, not instead of, grocery shopping.
What if I kill everything?
You will kill things. That’s not failure, it’s how the learning works. Every plant that dies teaches you something — about watering, light, soil, timing. Start with forgiving crops (salad mix, chives, radishes) and expect that the first season is mostly about learning rather than production. By the second season, you’ll know enough about your specific space and conditions to get much more reliable results.
Urban homesteading builds faster with the right foundations — the Starter Kit covers the essential small-space skills in one practical guide, built specifically for renters and apartment dwellers.
The No-Land Homesteader’s Starter Kit is a 45-page practical guide — container gardening, composting in small spaces, seed-saving, fermentation, and food preservation. $17.